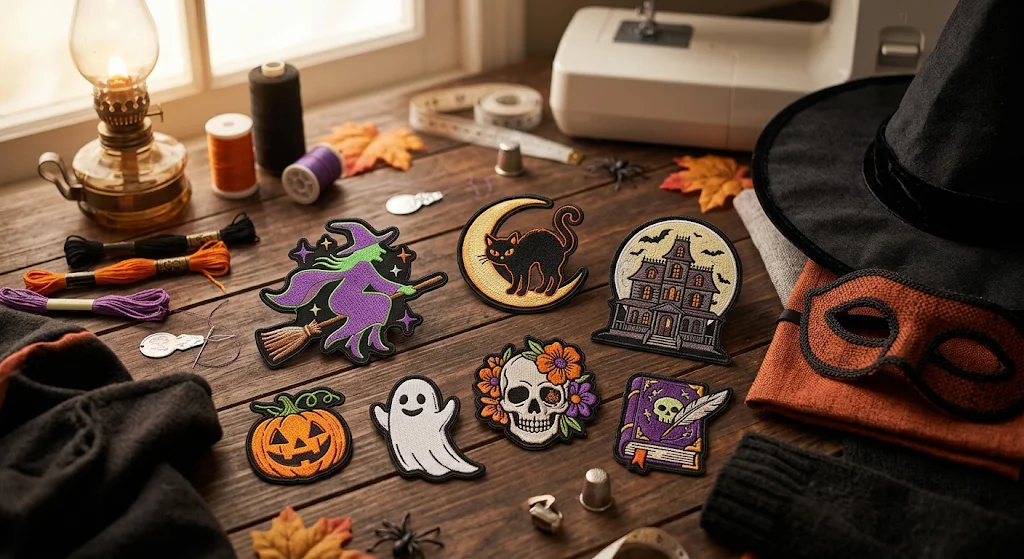
Custom Halloween patches can turn a plain costume into something unique. You can add a bat, a moon, or even your own name.
Halloween patches can be made in any patch style. The right pick depends on the fabric underneath and how much the costume will be worn.
This guide covers witch hat patches and Halloween costume patches for masks, cloaks, and jackets. You’ll see which patch type to pick, how to attach it, and how long an order takes.
What Are Custom Halloween Patches?
Custom Halloween patches are personalised, festive patches featuring Halloween-themed designs, such as pumpkins, ghosts, witches, bats, skulls, spiders, or spooky text, and you can add them to costumes, bags, jackets, and decorations. They are commonly used for Halloween costumes, parties, and decorations.
Which Custom Halloween Patches Suit Each Costume?
Halloween patches can be made in any patch type, but which one will suit your costume depends on the look of each type and what it does best. The following table will brief you on each type and what to watch out for when choosing.
| Patch type | Look and feel | Good for | Watch out for |
| Embroidered | Stitched, textured, neat edge | Cloaks, jackets, felt hats | Very small text can blur |
| Woven | Flat, made with fine thread | Small details, thin fabric, cloth masks | Less texture than embroidery |
| PVC | Soft rubber, rain-friendly | Trick-or-treat jackets, bags | Stiff, so poor on floppy hats and thin masks |
| Chenille | Soft, fluffy, raised | Big letters or one large shape on a cloak or hoodie | Bulky on small items |
| Applique | Layered fabric pieces | Bold shapes, such as a big moon | Fine detail is limited |
| Sequin | Sparkly catches the light | Stars and moons on hats and capes | Can snag loose knits |
| Sublimated | Printed in full colour | Night skies, gradients, artwork | No stitched texture |
| Leather | Flat, rustic look | Belts, hat bands, heavy costumes | Stiffer than fabric patches |
Which Backing Should You Choose for Halloween Patches?
Backing is how you attach your patch. The right one depends on your fabric, whether it can handle heat or stitches, and whether you want a permanent or temporary hold.
The following table will guide you in choosing which Halloween patch backing is a good fit for your costume and which you should avoid.
| Backing | How it holds | Best for | Weak spot |
| Sew-on | Stitched with thread | Most fabrics, felt, and hats | Takes more time and needs a needle and thread |
| Iron-on | Glue sticks with heat | Cotton, denim, and canvas | Heat can damage synthetic fabric and may not work well on curved surfaces |
| Hook and loop | Patch grips a sewn-on strip | Reusable costumes and changeable patches | Needs a sewn-on strip and adds some bulk |
| Adhesive | Sticks to the fabric with glue | Temporary costumes and decorations | May not hold well after washing |
| Safety pin | Held in place with a pin | Temporary costumes and easy removal | Can leave small holes in the fabric |
Can You Put a Patch on a Witch Hat?
You can put a patch on a witch hat. Witch hats are usually made of felt or polyester, which can melt or scorch with heat, so skip the iron-on backing. Sew-on patches are the safer choice.
A moon, a star, or a name with a witch hat patch creates a simple design and layout that fits best on the hat’s curved cone.
How to Sew a Patch onto a Witch Hat
- Stuff the cone with a rolled towel to keep the hat in shape.
- Pin the patch on the hat to keep it from sliding.
- Thread the needle with the thread that matches the patch border.
- Sew around the edge with small, even stitches.
- Knot the thread inside the hat and trim the end.
What to Look Out For
- Keep patches away from the eyes and mouth.
- Heavy patches can pull your mask down.
- Test the patch positioning in a mirror before you sew.
How to Iron a Patch on a Halloween Costume?
- Place the patch where you want it.
- Cover the patch with a thin cotton cloth.
- Set the iron on low to medium heat.
- Press the iron firmly on the patch for about 30 seconds without sliding.
- Turn the fabric inside out and press the back of the patch for about 20 seconds.
- Let it cool, then check the edges for lifting and press them again for a few seconds.
What to Look Out For
- Avoid ironing on nylon, polyester, leather, or other heat-sensitive fabrics.
- Do not use steam, as it can weaken the glue.
- Sliding the iron over the patch can shift it.
- Make sure the patch is in the right position before ironing.
How to Test a Costume Before You Iron On a Patch?
- Find a hidden spot on the garment.
- Set the iron to low heat and press that area for a few seconds.
- Check if there is any shine, shrinking, or a melted feel.
-
If the fabric changes, avoid ironing and sew the patch on instead.
Tip to Remember
An iron-on patch on a costume can lift after a few washes. Stitches around the border help.
What Patches Work on Halloween Masks?
Small, light patches like woven and embroidered patches work well on the masks, since masks sit on the face and need to stay light and comfortable.
Cloth masks can take iron-on or sew-on patches. Adhesive patches work well on plastic or rubber masks because plastic and rubber cannot take heat or stitches. Always check the mask material before you choose.
Which Halloween Designs Work Well on Patches?
Simple, bold shapes work best on patches like a bat, a crescent moon, a cauldron, a pumpkin, a black cat, or a name on spooky patches. On small patches, one clear image reads better than a complicated one with fine details.
Match the colours to the fabric. A black hat or cloak needs bright colours such as orange, purple, or green, because dark colours can disappear into dark cloth. A light border helps the shape stand out.
What Are The Best Colour Themes for Halloween Patches?
Selecting the right colours can make your Halloween patches look spookier, funnier, and more eye-catching. Here are some popular colour combinations:
- Black and orange
It is the classic combination because orange stands out sharply against black, so pumpkins, bats, and witch silhouettes are easy to read even from a distance. If you only want one Halloween patch, this is the safe pick. - Purple and black
This pairing complements witches, potions, and anything night-themed. Dark purple can mix into a black background, brighter purple is a better option, or add a white outline to keep the detail visible. - Green and black
Good for monsters, cauldrons, and creepy potions. Bright lime green is a better option than a darker tone, as a dull green next to black might look muddy. - Red and black
This one is bold and gives a slightly aggressive vibe, which is why it works for vampires and designs that depict blood. Red can fade into black, so a thin white or grey border helps it hold its shape. - Black, white, and orange
A simple choice of three colours that represent Halloween keeps the design clean and easy to read, and the white gives you sharp details like eyes, teeth, and lettering. - Purple, orange, and green
You can pick this one for costumes, party jackets, and anything meant to look funky rather than scary. Keep the design simple, the colours will do the rest. - Black and grey
This one is the better choice for a darker Halloween look, like skeleton and skull patches that do not need brighter colours, it sits well on a black jacket or bag. Tiny details can blur on small patches, so go slightly bigger than you normally would if you are picking this combo.
Can You Order Halloween Patches For a Small Group Set?
Patch maker UK does not require a minimum order, so that you can order a small batch for yourself and your friends. A small family can share one moon design patch made in the UK, with a different name under it for each person.
For a class or a staff team hosting a Halloween event, collect the names first and check the spelling twice, because a single wrong letter cannot be fixed once it goes into production. Tell us the size and quantity, and we’ll quote it.
How Long Do Custom Halloween Patches Take?
Turnaround for a standard order is 5 to 7 days. Count back from the date you will need your costume. Halloween falls on 31 October every year, so plan early. Give yourself enough time to approve your mockup. Then, keep some time for delivery, and then attach the patch.” was clumsy, so it’s now “Allow time to approve your mockup, for delivery, and for attaching the patch.
How to Order Custom Halloween Patches
- Choose your patch type and backing.
- Send your idea, logo, or sketch, plus the size you want.
- Check the free mockup and ask for any changes.
- Approve the mockup so production can start.
- Wait 5 to 7 days, then attach your patch.
We guarantee quality and on-time shipping, with no hidden charges.
Frequently Asked Questions
Can I wash a costume with a patch on it?
Yes, but wash it gently in cold water. Turn the costume inside out before putting it in the wash, then let it air-dry.
Can I move a patch to another costume next year?
Yes, if it’s a sew-on or hook-and-loop patch. Unpick the stitches with care or pull the patch off its strip.
Can I put patches on a child’s costume?
Yes, but choose sew-on patches and stitch them on firmly, and skip sequin patches for young children.
What size should a Halloween patch be?
Match the patch to the space it will cover, it should not be so big that it leaves no breathable space.
Can a patch cover a hole or stain on a costume?
Yes, a patch can hide a small hole or stain; just attach a larger patch over the stain or hole.
Can I mix different patch types on one costume?
A woven name patch next to a sequin star makes a nice duo. Put one main patch and one or two small ones so the costume does not look too crowded.
Choosing the Right Halloween Patch
Since the spooky season is here, choosing a Halloween patch can feel a bit confusing. If you follow the instructions given in this guide about the fabric, backing, design, and colours. Then you can pick the right patch type according to the job.
If you’re ready or still deciding, have a quick chat to get help or request a quote for custom Halloween patches with your idea and the size you need. We will gladly turn it into a free mockup for you to check.