Simply walk down any main high street in cities like Manchester, Bristol, or London, and you will find yourself noticing that uniform clothing is no longer in vogue. Instead, people are actively searching for ways to deviate from such standard high street designs and move towards secondhand stores and upcycling to make themselves an entire outfit that has its unique identity.
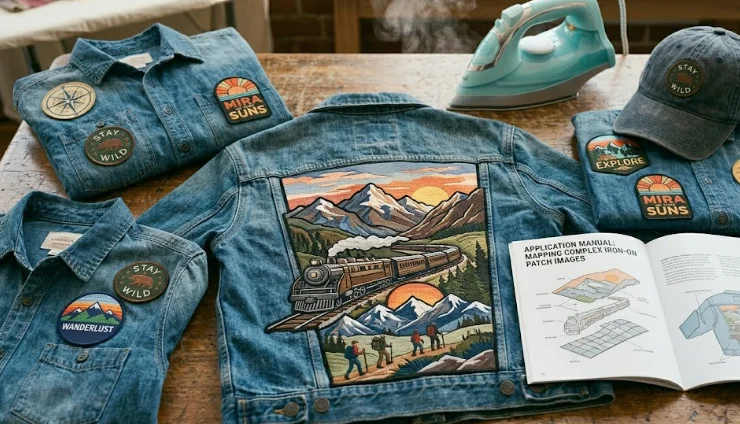
The easiest way to achieve this personalisation of your style would be to use patches that have been heat-activated. You could have these patches made for anything that strikes to be fancy, from a favourite local band to a design that you admire or even to cover up that one tear in your prized jacket.
Learning how to use iron on patches can give your clothes and gear an amazing touch, and you do not need any prior knowledge of sewing to make these emblems.
Attaching the Adhesive Backing of Iron on Patches
It is always best if one can grasp precisely what is occurring underneath when it comes to iron-on patches. If you have used any iron-on patch lately, then you must remember that the entire reverse side of the design would feel smooth and firm due to the presence of an additional layer of rigid plastic.
However, do not confuse this plastic layer for the packaging that needs to come off before applying the patch. In truth, this plastic serves as an advanced layer of thermoplastic glue. Under intense dry heat, this solid substance changes into a liquid form and flows straight into all the little spaces present between the fabric threads.
Once the adhesive becomes cool, it transforms back into its solid state and bonds with the fabric fibers to create a sturdy connection. One must understand these properties of the bonding glue if they wish to learn how to use iron on patch effectively.
Should you apply heat in small quantities, then the glue will remain solid, and the patch will not stick properly to the fabric. On the other hand, too much heat for too long will cause you to burn holes in either of the sides.
Assessing Your Wardrobe for Material Compatibility
However, before you turn on your iron and start tinkering with things, you should conduct a fabric audit on the garment that is to be modified. Heavy-duty natural materials that boast an incredibly dense and tight weave are best suited to this kind of modification.
Cotton, canvas, and thick wool felt can take extremely high heat levels in stride and thus make for an impeccable surface where customisation with an iron is concerned. So, as you are about to get down to business about how to use an iron on patch for the very first time in your life, check the care instructions sewn inside your garment.
If there is anything on the label warning you against excessive heat and if the fabric of your clothes appears to be light, slippery, and flexible, then you will have to think outside the box and take some precautions not to ruin your clothes in any way. Thin t-shirts and summery linen fabrics can do just fine, but only if extra protection is used.
Addressing Tricky Synthetics and Technical Outerwear
The one query that always confuses textile fans is rather easy: Can you use iron on patches on nylon or similar synthetic materials? Nylon makes excellent material for use in modern wind jackets, raincoats, backpacks, and even training wear because it is incredibly light and weatherproof.
Still, because nylon is created by synthetically combining plastics, it has an extremely low melting point. If you use the searingly hot household iron right against the nylon cloth, the latter will warp, shrink, and become unusable practically immediately. In such cases, one can try sewing on patches too.
Although it is possible to transfer such designs onto a piece of synthetic clothing with extreme caution and a high temperature barrier between the heat source and the fabric, this technique is too dangerous for an amateur to use.
In cases like waterproof coats, technical jackets, or even backpacks made of nylon, it is best not to try ironing the patch in question to avoid damaging expensive technical wear. Using specialised adhesive or simply sewing the edge of the emblem with a needle and thread is much more sensible here.
Essential Tools Needed Before You Begin Ironing on Your Patche
The success of the technique depends a lot on ensuring that all prerequisites for creating a secure atmosphere have been provided before you start ironing. First of all, you will require a trusty iron, and the very first step you should take is checking its water reservoir.
If there happens to be any water in there, you have to drain it out entirely and turn the steam function off at its full extent. The presence of steam means there will be moisture and small pockets of lower temperature inside the garment, completely preventing the creation of new chemical bonds between glue molecules.
Second, avoid using the regular, springy ironing board that is too soft or padded. Soft surface material will absorb pressure that your iron is supposed to provide. It will not help the heated metal to push melted glue inside the garment fibers. It is better to use a solid wooden table or a good kitchen counter, covered with a single fold of a pillowcase made of cotton.
Preparing the Fabric Bed for Ideal Adhesion of Customised Iron on Patches
It must be noted that your clothing item must always be absolutely spotless before you apply anything to it, namely the adhesive. It is recommended that one should always make sure he or she is wearing clean clothes, particularly new and never-before-used ones bought right off the shop floor.
All newly purchased items are invariably coated with chemicals and fabric softener fluids that create a sort of slippery film on the surface of the fabric and that will repel the hot glue, making it prone to peeling away after a few days. Once the clothing item dries out completely, it should be placed on the prepared surface with the design side up.
In order to prepare it for application, the iron should be used with its temperature at the highest setting for ten seconds or so. It helps serve two purposes: flattening out the tiny wrinkles that may affect the positioning of the design and drying the underlying fabric to absolute dryness.
Iron on Patches Technique Explained Step by Step
Once the fabric has been warmed and prepared, it is time to proceed into the main part of the application. Position your design on your article of clothing with care, taking a second to pull away from the work and verify that your emblem is aligned correctly with seams and collars.
Finally, carefully position your pressing cloth above the design in order to prevent unwanted movement. When it comes to addressing the issue of efficiency in relation to how do you use iron on patches effectively without your patches falling off after being iron-pressed, the trick all lies in utilising nothing more than sheer dead weight and total immobility.
You should not move your iron side to side as if you were attempting to get wrinkles out of a dress shirt. Moving the iron in this way would result in a messy smudging of the glue underneath your design.
Rather, you should press the iron straight down on the pressing cloth with enough strength that your entire body weight is pushing down on the iron’s heating surface. Keep the iron stationary for twenty-five to thirty seconds before lifting it up and relocating it to an area of your emblem where there is no melted glue present yet.
Securing the Iron on Patch Bond from the Inside Out
After the initial pressing is done, avoid the instinctive urge of immediately pulling at the edges to check if it has stuck on. The adhesive is in its melted form and quite fragile at the time, and any interference would only result in the bonding process being compromised. In lieu of this, allow the area some time.
About a minute’s worth, until the temperature of the spot is brought down to normal levels. Afterward, take your shirt and turn it inside out, positioning yourself such that you have access to the reverse side of the material under the emblem.
Take your iron and press down on the reverse side of the fabric hard for fifteen to twenty more seconds. This step is important since the heat pulls the melted adhesive into the inner layers, weaving it within the weave of the material.
Transforming Workwear and Everyday Wear
It goes without saying that denim is absolutely the best material for customisation, but due to the fact that it is an incredibly heavy, thick, and tight textile, some structural changes are required in order to learn how to use iron on patches for jeans.
It is important to understand that the thick and indigo colour threads serve as excellent insulators, so it will take quite some time for the heat to reach the glued side of the fabric.
When it comes to customisation of the legs, pockets, and knees of heavy denim jeans, you may safely spend about thirty-five seconds to press your patch, applying maximum physical pressure.
This is necessary due to the fact that jeans are constantly stretched during walking and sitting, and as a result, the edges of the emblem constantly face mechanical pressure. In order to prevent them from detaching, experienced customisers use a small running stitch at the edges of the emblem, thus creating an impeccable backup.
Laundering and Caring for Your Upcycled Wardrobe
First of all, congratulations because now your unique symbol is firmly attached. However, the task at hand now is only one proper maintenance to preserve your hard labour throughout its entire lifespan.
First of all, whenever you wish to clean your clothes decorated with such elements of heat-applied printing, it is important that you turn the item completely inside out before you place it into a washing machine.
It ensures the raised elements of embroidery are completely protected against any damage that may come from interaction with rigid metal zippers, plastic machine drums, or hard buttons.
Secondly, use a cool cycle when you wash such clothes up to thirty degrees Celsius or less, as recommended. Moreover, avoid biological washing powders, since heat could cause gradual reactivation of the adhesive and result in the destruction of the design.
At last, it is very important that you never place such clothes in a tumble dryer, since it could significantly deteriorate the condition of the glue and destroy the edges. Instead, always opt to air-dry your shirts, jackets, and trousers naturally on a clothes maiden or an outdoor washing line. Other than that, removing iron on letter patches will be essential if you are really curious regarding iron on patches removal.
Frequently Asked Questions
What should I do if the pointed corners of my patch start to lift up after a few months of heavy wear?
If the edges of your patch lift over time, do not worry. This minor peeling means the adhesive has detached. Lay the garment flat, cover with a pressing cloth, and use a hot, dry iron for fifteen seconds to reset the glue.
Can I safely use a modern steam pod or garment steamer to apply these adhesive designs?
Never use a garment steamer or steam pod to bond fabric with heat-activated adhesives. Steamers provide moisture instead of the intense dry heat and pressure needed, damaging the adhesive’s properties.
Is it possible to remove an patch from a shirt if I want to change its placement later on?
Removal is achievable by placing a pressing cloth over the design and applying a hot iron for about twenty seconds to melt the adhesive. Once melted, use tweezers to peel the patch off, noting that some glue residue may remain.
Does the thickness of the patches alter the amount of time I need to spend pressing it?
The design’s thickness significantly affects your timing strategy. Thicker embroidered patches require an increase in pressing time by five to ten seconds compared to thin woven designs to ensure heat penetrates adequately through multiple dense thread layers.
Craft Your Next Iron on Patch Piece with Patch Makers UK
Joining the exciting journey of designing your unique clothing through customisation is an excellent choice and a sustainable one too since you can customise and breathe life into old clothes that would have been left to rot in the back of your closet.
With the information needed on how to manage different materials, understand how heat works, and effectively care for the completed design, there are virtually no limitations to what you can do with the skills acquired.
If you feel adventurous and eager to begin a journey into the wonderful world of textiles, check out our wide-ranging and beautifully curated selection of designs at Patch Makers UK. Our patches are of high quality and feature outstanding details, which make them easy to apply and last longer.